Saturday, December 26, 2009

The Best Time of the Year!

I hope everyone has had a wonderful Christmas! Those traveling to our house arrived on time (although their luggage decided to take a separate flight), and everyone was well. A whole lot of eating, laughing, and game playing took place. The house is a disaster, which proves that we all had a good time. The son in Iraq called and we all had a chance to talk, so all in all, it was great Christmas at our house.


Now the best part, the sweets have been devoured, the gift giving is over and the company will still be here for a few more days! That means that there are still movies to be watched, games to be played, and more time to spend together without as many distractions. Although I love Christmas, my dirty little secret is that the day after is my favorite day of the year! After weeks of planning and preparing, I am ready to move on to other things.


If the company was not in the way, I would be yanking that Christmas tree down today!


Merry Christmas and Happy New Year to all!

Saturday, December 19, 2009

Pure Bliss!

There are no words to describe the joy of having additional lighting added to my sewing room! I have struggled with the lack of light since the move last Spring. I finally decided that the problem was not going away and bought two track lights at Lowe's.


My sweet husband has spent the entire day installing them, which included numerous trips into the attic and a boo-boo on his head where he raised up into one of the rafters. The job is finished and the lighting is fantastic. I will now be able to be creative after 3:00 PM on the gloomiest winter day!


Thursday, December 10, 2009

Lace Insertion

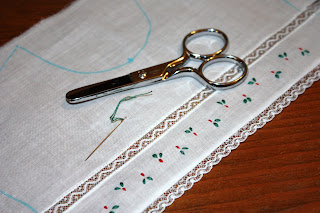
Stitching lace insertion to fabric is the first technique that we learn when I teach heirloom sewing by machine. This is not a strong application of lace and best used on collars, yokes, or sleeves.
Lace insertion is the lace that is straight on both edges. If one side of the lace feels rougher than the other, this is the wrong side of the lace. I have used a contrasting color thread for the photos. Use a fine machine thread that matches the lace and a 60/8 size machine needle.

Starch and press the lace and fabric. Using a wash-away marker, mark the lace placement lines on the fabric. Set the sewing machine on straight stitch length of 2.0 and stitch close to the edge of the lace down both sides. I prefer to stitch from top to bottom each time to prevent the fabric and lace from distorting.

Turn the fabric to the wrong side, and carefully cut the fabric between the stitching lines, being careful not to cut the lace. Press the fabric away from the lace.

On the right side of the fabric, using a zigzag stitch of 2.0 width and 0.7 length, stitch over the previous stitching line. The stitch should "zig" into the lace and "zag" into the fabric.

On the wrong side of the fabric, using blunt scissors, trim away the excess fabric.

Starch and press the fabric and lace before continuing with your garment.
I first started doing heirloom sewing about 15 years ago while doing custom sewing for "Joy's of Smocking" in Decatur, AL. I still love working with lace and fabric!

Friday, December 4, 2009

Favorite Resource Book!

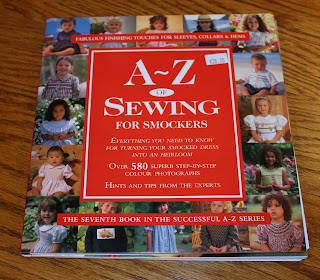
While we still have time to add to our Christmas "Wish List", I thought that I would recommend one of my favorite books! I love all of the books in the "A-Z" series, published by Country Bumpkins, but have found that this is the one that I refer to the most often. Besides smocking construction, it is filled with the instructions for almost every basic construction tip that you can think of. The book includes collars, plackets, and sleeves, and has clear photos of each step!

My copy appeared under the Christmas tree addressed "To- Michie' From- Santa". Boy, was my family surprised!

Thursday, November 26, 2009

Happy Thanksgiving

I'm hoping that everyone is having a wonderful Thanksgiving with family and friends! My first e-mail this morning was from our son in Iraq. After 18 hours on the road they had finally made it safely to the next base. He said that the Thanksgiving dinner that was waiting for their arrival did wonders to sooth their frazzled nerves. Lets all remember how much we have to be thankful for!

Michie'

Tuesday, November 24, 2009

Christmas Baby Boy Bubble

Of course, we need a Christmas bubble for baby boy! When I sew for boys, I like the clean look of tiny tucks. This button down the front bubble, with tiny tucks and a touch of embroidery was made using pattern #129.

The tiny tucks are stitched in place before the two fronts are cut out. This gives you the option of making your tucks slightly smaller or larger, and helps to insure a better fit for your finished garment.

After the bubble was completed, I decided that it needed more color. I used a Running Stitch with one strand of DMC floss along the front placket and sleeve hems. Because, I had already stitched down the placket and sleeve hems, I had to pull out the machine stitching as I went. This took time, but also gave me a guideline for the Running Stitching. Instructions for the Running Stitch can be found in the Heirloom Embroidery Book.

Directions for the "Holly and Berries" embroidery can be found on the Christmas Dress blog.

Monday, November 23, 2009

Sweet and Simple Christmas Dress

This little Christmas dress, demonstrates that simple, is sometimes best. Pattern #104 is one of my favorites, because there is so much that you can do with the yoke overlay. I had some beautiful white pima cotton fabric and scraps of lace that were perfect for a Christmas dress. Sketching my design gives me a chance to make sure that I am happy with my style and color choices before I start the project.

I trimmed the yoke overlay with lace edging along the bottom edge. A 1" space was left between the lace edging and lace insertion for the embroidery. The holly berries are spaced 1/2" apart and were worked with one strand of DMC floss. The berries are Granito Knots worked with 5 stitches and the leaves are Filled in Lazy Daisies. Instructions for the stitches can be found in the "Heirloom Embroidery Book."

Once the yoke overlay was completed, the dress went together very quickly. I also added a strip of lace insertion down the center of each sleeve. This dress would be lovely for Spring, stitched with pink rosebuds.

Sunday, November 22, 2009

If I Were a Squirrel

If I were a squirrel, I would need to wake up limber, in order to reach my breakfast!


It would take me quite awhile to eat one sunflower seed at a time, but that is OK, because when you are a squirrel there isn't much on your "To Do" list.

Saturday, November 21, 2009

Button Rescue Project.

Do you save buttons? In my family, we can trace the, "Can't throw away a perfectly good button" impulse back to the invention of the button! All of the women in the family, had a small box or jar of odd buttons with their sewing supplies. These buttons were ready and waiting for a "button emergency" when the perfect button would step forward from the collection and save the day! I am proud to say that I have carried on the tradition of saving buttons. As busy as I am, with available money to buy buttons, with a button company offering me FREE buttons for my sample garments, I still could not throw away this old work shirt without rescuing the buttons. I took the time to snip off each button while I thought about what future life they may have, and then strung them on a thread before dropping them in my button box. Yes, it took a little time, but sometimes slowing down for these little projects reminds me of how fortunate we are to live where small things like buttons are readily available. And besides, I bet those buttons are worth at least $2!


Tuesday, November 17, 2009

Why You Will Not Find Recipes On My Blog

I have noticed on numerous blogs that it is common to occasionally post a favorite recipe. Although I enjoy seeing what others have been cooking, I promise that my cooking is not worth sharing with the rest of the world!

This all came to light Sunday, when I realized that I need to take homemade cookies to a ladies gathering at church Friday night. On the way home from church I looked at my husband and said, "I think I have a problem."


1. It has been about 10 years since I made cookies. No joke, once our daughter was old enough to bake, I retired.

2. My only cookie recipe is the one on the bag of M& Ms!

3. They always tasted fine but did not look that great.

I am now waiting for our daughter to e-mail a cookie recipe that I can handle!

Update- She just e-mailed a cookie recipe and asked me to bring the salad and rolls for Thanksgiving............................... Draw your own conclusion!

Monday, November 16, 2009

Any Christmas Sewing at Your House?

I have spent the weekend making purses for Christmas gifts. I made my own pattern for the purses, but found one very similar at http://www.latebloomerquilts.com/, the "Messenger Bag." The purses are made out of denim and cotton print fabric.

The stiffest washable interfacing I could find, gave the purses enough body to stand up! In the photo, you can see the inside zippered pocket.

The first purse turned out so well that I immediately made a second. It is the same pattern, just a different layout of fabrics on the front.

I now have a turquoise and black print fabric cut out to make two more purses, and can hardly wait to see how they turn out. The hardest part of this project is going to be deciding which one to keep for myself!

Are you making any of your gifts this year? I would love to hear what you are working on!

Thursday, November 12, 2009

Do You Share the Vision?

Most of us tend to follow the style trends a little to close, and forget that sewing is our chance to experiment with style and color. Our daughter arrived with a "Retro" Simplicity pattern and an unusual choice in fabric for our Saturday sewing. I had trouble "Sharing the Vision" for this dress, but she was confident that it would look great.


Wow, was she right! This project reminded me to be more daring with pattern and fabric combinations!

Monday, November 9, 2009

Saturday Sewing

Daughter and I, were finally able to get together and do some sewing for her! We were able to meet earlier in the week and decide on patterns and fabrics, so once it was time to sew, everything was cut out and ready to go. Two skirts were quickly completed and then we moved on to the dress. Because the dress was a fairly complicated pattern, I took the time to make a mock-up version out of muslin and fit it to the dress form. It is a time consuming step, but worth the effort. Once we were happy with the fit of the muslin version, we were able to move on to the dress with the confidence that it would fit when completed!

She picked out a light weight suiting fabric and the pattern was Simplicity "Project Runway" pattern #2550. It was one of the best fitting patterns and had the best directions that I have seen in quite awhile!

Our "tag team" sewing consists of one of us sewing while the other reads the instructions, cleans up, rips out mistakes, and tells funny stories. We also played with my new camera, and watched funny videos on Youtube! When the one doing the sewing starts making mistakes or whining, we trade places.

She was thrilled with the dress and it was a perfect fit! Is it my turn next?

Wednesday, November 4, 2009

My Sewing Room

I'm often asked, "Do you have an awesome sewing room?" I am always caught of guard by the question, because I think that if you have ANY place to sew, it is awesome! A small bedroom of our home, serves as my sewing room and office for the business. The size of the room can be a challenge, but since I don't like clutter around to distract me, it works out great.

One corner has the sewing machine, serger, and ironing board grouped together. A small cabinet in the corner is handy for laying supplies on while sewing and has great storage. The small bulletin board over the sewing machine is extremely useful for holding notions and pattern pieces!

The desk and computer are next to the sewing machine. There is a large bulletin board covered in fabric and a prefab shelving unit in the corner. My favorite thing in this area is the radio mounted under one of the cabinet shelves!

The prize for "Coolest thing in my sewing room" goes to the cutting table. We bought the cheapest prefab kitchen cabinet base that we could find and lay a cutting board on top. It is the perfect height and has fantastic storage underneath!

A double closet on the remaining wall holds the patterns ready for shipping, and there is another shelving unit next to it. There is not room for my drawing table, so it stays in the quest room until time for company.

And now you are wondering, "Is her sewing room always this clean?" Absolutely not! Creativity is messy!

Saturday, October 31, 2009

Piped Collar

Making your own piping and attaching it to a Peter Pan collar is easy, and gives any garment a more professional look. Here are the basic steps.

I like to use baby cording, which I order from http://www.marthapullen.com/. Working with one collar at a time, cut a piece of cording the length of the outer edge of the collar. Fold the fabric at a 45 degree angle (the fold line should be the length of the cording) and cut along the fold line.

Measure in 1" from the cut edge, to cut a bias strip.

Wrong side together, fold the bias strip over the cording. Using a zipper or cording foot, stitch close to the cording to make your piping. I have used a contrasting thread so that it can be seen in the photos. You would normally use thread to match the fabric.

Clip into the fabric, close to the stitching line, at 1/2" intervals.

Check the seam allowance for your pattern and with right sides together, pin the piping to the outer edge of the collar. Stitch close to the cording, over the previous stitching line. * Sew around the curve of the collar in a continuous motion. Stopping and lifting the presser foot to pivot will cause small points in your collar.


Right sides together, pin the collar lining to the collar.

Using the previous stitching line as a guide, stitch the collar and collar lining together. *Stitch slightly to the left of the first stitching line.

Trim the outer edge of the collar, leaving a 1/4" seam allowance. Clip into the seam allowance about every 1/2".

Turn the collar right side out and press. Repeat the steps for the other collar and continue the construction of your garment.

Monday, October 26, 2009

"What Have You Been Doing Fun?"


"What have you been doing fun?" This is the question that our family has begun asking each other when we have a chance to talk. Our four adult children are scattered around the world so when we talk we are REALLY catching up! We have discovered, that when we stopped asking,"What have you been doing?" to "What have you been doing fun?" the dynamics of the conversations began to change. "Fun", by our families definition, does not have to be big and expensive but can also be little insignificant things. By challenging each other to have more fun, we have become more aware of how we are spending our free time and get some really neat ideas from each other.

This weekend was not exciting, but we totally enjoyed it!

Went for a walk through the neighborhood to enjoy the Fall weather. (Walked fast....got chilly!)


Read favorite blogs while he watched the ballgame.


Played with colored pencils while he watched another ballgame. (I was pleased that I could find things to do during the ballgames!)


No nap after church, but the phone call WAS from Iraq!


Took our time with the paper.


Coffee on the deck, where we discussed, "What kind of animal noise is that in the woods?"


Took new camera on a "field trip." (See above pictures)


Read camera books, so that I will not have to take 75 pictures to get 3 good ones on each outing!


We also discovered that the kids enjoy talking to us more if we are not bored and "Wishing you were here." We can hardly wait for the Fall foliage to peak during the next few weeks. We are already making our plans!


Friday, October 23, 2009

Floss Wrapped Rickrack

Floss wrapped rickrack is an easy technique used to add extra color to your project. The rickrack can be either machine stitched to the fabric first, or stitched to the fabric using only the floss. I used floss wrapped rickrack to edge the collar of the romper for "First Day of Spring", and on the dress "Spring Flowers."

Using three strands of DMC floss, thread the needle and tie a knot in one end of the thread. Insert the needle through the back of the fabric and come up above the rickrack in one of the "valleys."

Insert the needle through the fabric below the rickrack, and come out above the rickrack. Pull the thread all the way through.

Continue to the end of the rickrack and tie off on the wrong side of the fabric.

LinkWithin

Related Posts with Thumbnails