Thursday, September 29, 2011

A Fall Romper For The Boy

Of course we couldn't leave the boy out when it comes to fall clothes! You might remember this romper made by pattern #103 from previous blogs which included tutorials for the bias edging on the collar and the satin stitched pumpkin.

Don't you love his expression? He is asking why on earth I am taking his picture when he is getting hungry!

The green fabric is Featherwale Corduroy and is one of my favorite fabrics for fall and winter. Besides coming in a beautiful range of colors, it is also suitable for smocking.

Michie'

Monday, September 26, 2011

A Fall Romper For The Girl

I can't believe that fall is finally here and the babies are going to need clothes for the cooler weather. This romper made by pattern #103 has been part of my Trunk Show for several years and it was a happy surprise the 12 month size is just what Emma needs.

The twill fabric is a nice weight for cooler weather and pleats up nicely. Some basic geometric two step waves were all that was needed in shades of green.

I have had several of you ask about the fabric used for the diaper shirt in the previous blog and Stephanie was kind enough to leave a comment with the information. Thank you!


Stephanie said...
I bought some of this fabric at The Square Quilter in Shiner, Texas. Their phone number is 361-594-8022, and their web address is thesquarequilter.com When I bought it, it was on sale, and she said she still has some.

Michie'

Thursday, September 22, 2011

A Tip For Neckbands

It's the little tricks and tips that we sometimes don't even think about that give our sewing that nice finished look. Whether it is a diaper shirt or a bishop dress, a nice neat neckband gives the garment a professional look.

Remember, that your neckband is always cut on the bias according to your pattern instructions so that it will turn nicely and that the goal is to have a small neckband of about 1/4", so there will be some trimming. Neckband are usually drafted a little wider than this so that the brand new beginner will not totally freak out. But for you seasoned sewers or you fearless beginners this is where you can really show off your skills!

And what is this nifty trick? Simply this, after you have stitched the neckband to the garment, zigzag close to the stitching using a width of 3.5 and length of 2.0. Next, trim away the excess fabric close to the zigzag stitching. Not only does this give you a guide for trimming, it also gives a little stability to a neckband that may get a lot of abuse from a little one!

Finish the neckband by trimming the neckband so that there is just enough left to turn under the raw edge and turn again so the you are slip stitching the folded edge to the first stitching line that attached the neckband to the garment. This will give you a nice neat neckband that is only about 1/4" wide.

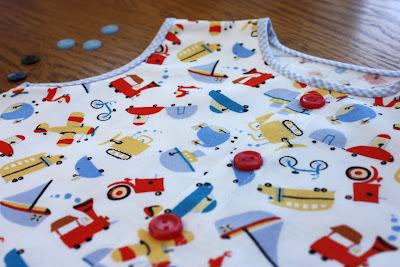
I had a few inquiries about this sweet fabric. I wish I had more information. I purchased it from Beth's Heirloom Sewing http://bethsheirloomsewing.com/ over a year ago. The selvage says "Westminster Fibers #DW 26 Vehicles Allover."

Best of luck with your neckbands!

Michie'

Monday, September 19, 2011

A Pink Dress For Emma

First of all, how did our sweet girl get to be 10 months old in such a short time? And how am I going to be able to wait until November to see her again? In my opinion, one of the very best things about our technology age is that grandparents can stay in touch with e-mails and photos. And a special blessing to you young parents who take the time from your crazy day to post to the folks back home!

This is one of the little dresses that I took on my visit in August. The dress is made by pattern #106 and is such a practical and sweet dress for a little one. I used Imperial Batiste fabric so that the dress would need little if any ironing. I was told that I receive HUGE Nana points if things don't need to be ironed and I'm taking this seriously!

The beauty in this dress is the collar details. A tiny bias band is attached with a Bridging (Faggoting) stitch and a Bullion rose adds a little color. Detailed instructions can be found for the Bridging and the Bullion rose in the "Heirloom Embroidery Book."

Michie'

Sunday, September 18, 2011

You May Be A Winner!

Art store in Seoul, South Korea Sept. 2010

A very special thank you to each and every one of you who took the time to enter the free giveaway by leaving a comment "When do I find time to sew?" And just think.......while you were writing your comment you could have been sewing! So, I do appreciate you sharing your time with me! :)

I loved reading each and every comment. Many made me laugh or brought back memories of my own sewing struggles. I remember being so pressed for time when the 3 boys were under 5 years old that I would think that, " If I just get one seam in it would be better than none!" One of my favorite comments said that she had more time for sewing before she discovered blogs!

And so, here are our two winners.

Julie said...

I work full time so I sew the most in the evenings and on the weekends. But we are expecting our first baby so I have kicked the sewing into high gear and try to do as much as I can whenever I can!!!

Marnita said...

I typically sew early on Saturday mornings while my crew sleeps in. I also have a sewing buddy and we will sew one night a week from about 7:00 until 10:00. My brain turns into mush after that. Wish I had the energy to sew after I get home in the evenings on my own but that just isn't the case. Love your blog. We are expecting our first grandchild in a few weeks and your blog gives me plenty of ideas for our little man. Thanks for all you do.


I need each of you ladies to please e-mail me at crmichie@aol.com with your complete name, address and the pattern that you would like sent to you.

Michie'


Thursday, September 15, 2011

Choosing A Contrasting Fabric

I broke my own rule and purchased the print fabric with no project in mind. Sometimes the colors and graphics are just really good! Although the fabric would make great shorts for a toddler, it is a little busy for a baby boy. The best solution was to try to tone it down with a contrasting fabric. I pulled out my gingham scraps and began auditioning the fabrics. Black, red, and gold all went well, but the blue toned the primary colors down.

I went through the same process with the buttons, taking the time to lay out different colors to see which ones had the best impact without being overwhelming.

This is should be a fun and creative process, so don't let it slow you down too much. There are no wrong choices! :)

Michie'

Tuesday, September 13, 2011

Random Free Giveaway!

When do you find time to sew? I want to know! Do you sew early in the morning or late at night? Do you sew during nap time or while supper is cooking? Do you work in long sewing sessions or do you sew in snatches? I have done all of the above and then some except for that late night thing. Right now Saturday football is a great time for me to sew! He had much rather me be sewing than saying, "You mean there are 3 important games back to back! How can they all be important?"

So, let's have a little giveaway. Leave a comment on this blog about when you find time to sew, and I will pick two random winners this Saturday night (during the ball game of course) to win a free pattern or book of your choice! Be sure to leave your email address with your comment so that I can contact you when you win.

Michie'

Monday, September 12, 2011

Candy Corn For The Boys

Of course we need some cute ideas for the "Candy Corn" smocking design that will work for the boys! Here are a couple of ideas that I pinned to my design board. Black pique' and black and white gingham would be great fabric choices. I threw in a strip of yellow gingham that I might want to consider for piping. Patterns #115 and #134 were the first to pop into my mind, but a Jon-Jon with a long sleeve shirt would also be really cute!

Since candy corn is Grand da Rex's favorite candy in the whole world, to the extent that I learned several years age not to put them in a center piece....Christian just might need a candy corn outfit!

Michie'

Friday, September 9, 2011

Candy Corn Smocking Design

The floss colors showed up so pretty on the black and white gingham, that I just had to throw in another picture! When Anna was little, it was a little unusual to put an infant in dark colors, but her dresses always got plenty of compliments. Now there seems to be no rules at all and we see little babies in bold prints and every color in the rainbow.

The "Candy Corn" smocking design is a simple design and is very easy for those new to Picture Smocking.
Click here for the printable Smocking plate.
*Not to leave the boys out, the next blog will share some ideas for putting the "Candy Corn" smocking design in a outfit for our little guys.
Michie'

Wednesday, September 7, 2011

Shoulder Closure Bishop

Here is pretty and easy technique that is great when you prefer not to have the opening down the center back of the dress. Basically, the back of the dress is cut on the fold and the placket is sewn in where the left sleeve and back of the dress join.
To print these instructions on a full page click here.
Michie'

Monday, September 5, 2011

Candy Corn Bishop

What says "fall" better than candy corn? This dress is seasonal without being Halloween specific. The dress is made out of black gingham using pattern #135.
Instead of opening in the center back, the dress opens on the left shoulder. The next two blogs will give you a tutorial for the "Shoulder Closure Bishop" and the "Candy Corn" smocking design.
This dress is already in the mail to Emma. I'm sure that she will look cute as a button as she gets ready for fall!
Michie'

Sunday, September 4, 2011

Measuring The Baby

I've had a few questions lately about measuring the baby or in this case the little wiggle worm! This measuring session became a wrestling match and I think that Christian won. Since he discovered his feet a few weeks ago, this is what most of his pictures look like. We even tried holding his feet down for a couple of shots and he wrinkled his little face in the funniest frown ever. But wait, that has nothing to do with measuring except you will want to try to do it when they are in a pretty good mood!

At this infant age there are only a few basic measurements that you need. Waist, thigh, neck to crotch, neck to ankle, and dress length (for the girls). In this picture you see his fat little thigh being measured. I would then add about an 1/2" to 1" for the elastic in a bubble leg. The same rule is used for the waist measurement.

The most important measurement is the Neck to Crotch measurement. This measurement is taken from the base of the neck to mid crotch. I normally would help hold and flatten the little guy for this, but I was busy with the camera and how mad did we really want him at this moment?

The neck to ankle measurement is needed for a long Jon-Jon or romper. Measure neck to mid calf for a dress length. Once you get the measurements, you can refer to the Size Chart.

I also have the problem that many of you have with a grand baby who is out of state. I demonstrated the measurements that I need so that Tiffany can now send new measurements to me occasionally. To play it safe I sew a size bigger than Emma is wearing and send it on, so that it will be hanging ready in the closet when she wakes up a size bigger one morning!

*As we watched football this Labor Day weekend, we couldn't help but remember how exciting last year was!

Michie'

Thursday, September 1, 2011

A Diaper Shirt That Daddy Will Love

Christian's daddy is a huge Alabama football fan, so what could be better than a diaper shirt made from a tiny elephant print in the appropriate colors? Anna made the outfit and did a wonderful job. She is a beginner to sewing, and is catching on really fast.


The day we were taking these photos, Christian discovered that he had feet! Out of the 4 different outfits we photographed, every single one had his little bottom in the air as he played with his feet until...
we flipped him to his stomach!
This weekend starts college football and the guys in the family are ready. What a difference a year makes. Last year on Labor Day weekend, Ben and Tiffany called to say that they had been matched for adoption and Anna called the next day to tell us that they were pregnant! I still remember being so excited that I was screaming in the phone!

Michie

LinkWithin

Related Posts with Thumbnails