Friday, January 30, 2009

Fun With Retro Fabrics


Sometimes you just absolutely fall in love with a particular fabric. That is exactly what happened when I ran across this retro cotton print! Retro fabrics are cottons prints with an old-fashioned look. I used pattern #118 Diaper Shirt & Shorts for this little boy outfit. This is just the type of outfit that I liked to sew for my baby boys. The cotton fabric washes and wears well, the colors are masculine enough to suit dad, and what can be more comfortable than a shirt and shorts? I also discovered that while our little ones can outgrow a bubble quickly; they can wear an outfit with separate pieces a little longer.

Monday, January 12, 2009

Outline Stitch


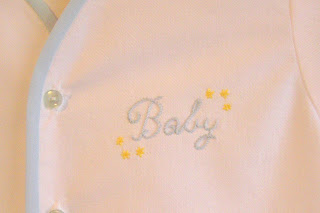
I think that the very first embroidery stitch that I learned was the Outline Stitch, also known as the Stem Stitch. This is one of the more popular embrodery stitches. In the previous blog the Outline Stitch was just what was needed to embroider the lettering. Two strands of DMC floss and tiny stitches are usually best for a delicate look. The Heirloom Embroidery Book has clear illustrations and directions, along with many embroidery designs for your sewing projects. When I teach the Outline Stitch, I remind students to keep their stitches small and neat, but more importantly, the stitches should be consistent in size. Embroidery is like your handwriting, everyone's is different, and that is what makes your handwork unique!

Thursday, January 8, 2009

Adapting a Pattern

I love taking a favorite pattern and changing it slightly to achieve a new look! For this project, I used Baby Daygown #128, white flannel for the gown and pale blue Imperial Batiste for the bias binding. A few simple steps are all that are required to adapt the pattern. After tracing off the pattern onto light weight paper, I used a red pencil and marked 3/8" from the neck edge and the front edge of the gown. I also marked the gown back neck edge 3/8" from the edge. Using a 5" embroidery hoop as a template, I drew a curved edge on the front neck edge and on the bottom front of the gown. I then cut out the new pattern for the front and back along the red marks. I then lengthened the boy's sleeve pattern 1 1/2". I cut the bias band 1" wide and stitched it in place with a 1/4" seam, then on the wrong side, I turned under 1/4" and slip stitched it in place by hand. After the gown was completed, I then added the embroidery using a design from the pattern. This was a fun project for these cold winter evenings and will be a great gift for a January or February baby!


LinkWithin

Related Posts with Thumbnails